
Evening
The room settles into softer light, the blinds bring privacy and your chosen music sets the mood. A coordinated scene gives these separate systems a shared purpose.
Soft lighting | Privacy shading | Selected music

Services
Beautifully connected, from the first drawing to everyday living.
The finished home
The room settles into softer light, the blinds bring privacy and your chosen music sets the mood. A coordinated scene gives these separate systems a shared purpose.
Soft lighting | Privacy shading | Selected music

Lighting highlights the spaces where people gather, with music arranged for the rooms in use. Kitchen, dining room and terrace each play their part in the evening.
Gathering spaces | Room-by-room music | A shared atmosphere

The picture and sound are ready, distracting light is reduced and the room takes on its cinema setting. The entertainment and room controls belong to the same considered design.
Picture and sound | Reduced light | Cinema shading

Selected lights turn off, shading moves to its night-time position and the home follows the routine agreed with you. Each room remains personal; the controls bring the useful actions together.
Selected lights | Night-time shading | Your agreed routine
Lighting and shading shape the atmosphere; sound and picture create the entertainment. Thoughtful controls and a planned network bring the chosen systems together.
Design illustrations. Scenes and supported connections are agreed for your home; these controls change the illustration only.
The work behind the result
A coordinated sequence gives each trade the information it needs and each room the attention it deserves.
Stage 1 of 7
Agree the rooms, routines and scope boundaries.
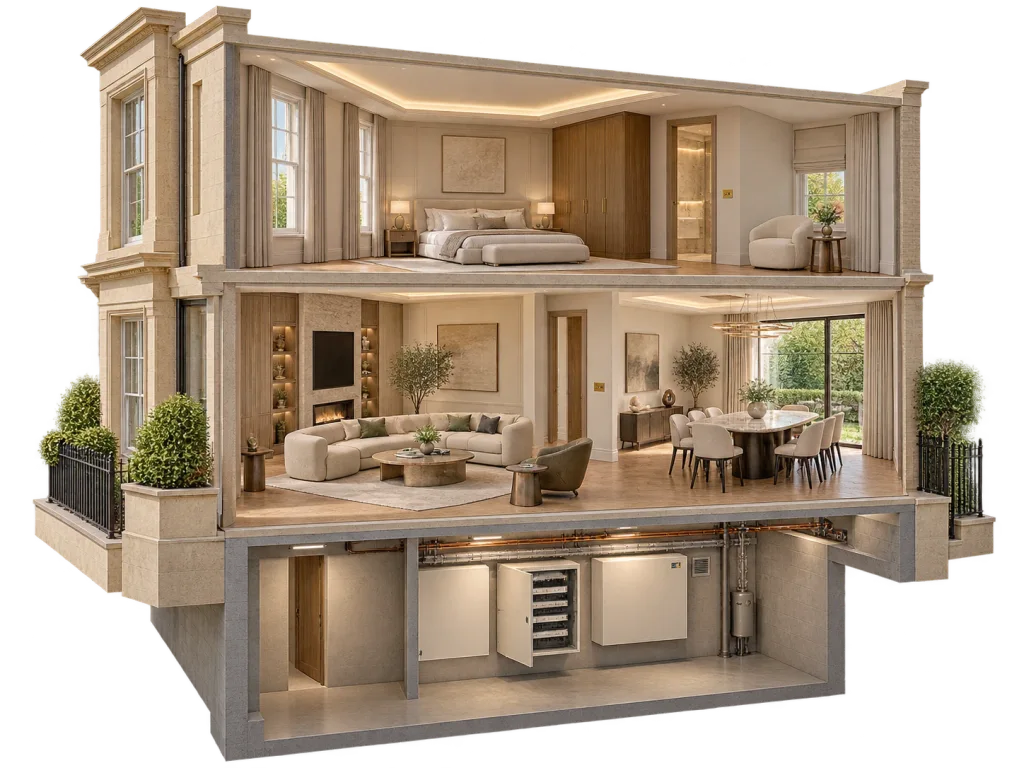
Every project begins with a conversation about the home. We look at the drawings, the spaces you use most and the experiences you would love to create. We discuss lighting, window treatments, music, television, cinema and room controls alongside your priorities for the project.
For a refurbishment or new home, this brings the technology into the design at the right time. For an existing property, we review what is already installed and shape a practical route to the improvements you want.
Stage 2 of 7
Coordinate the positions, equipment and specialist interfaces.
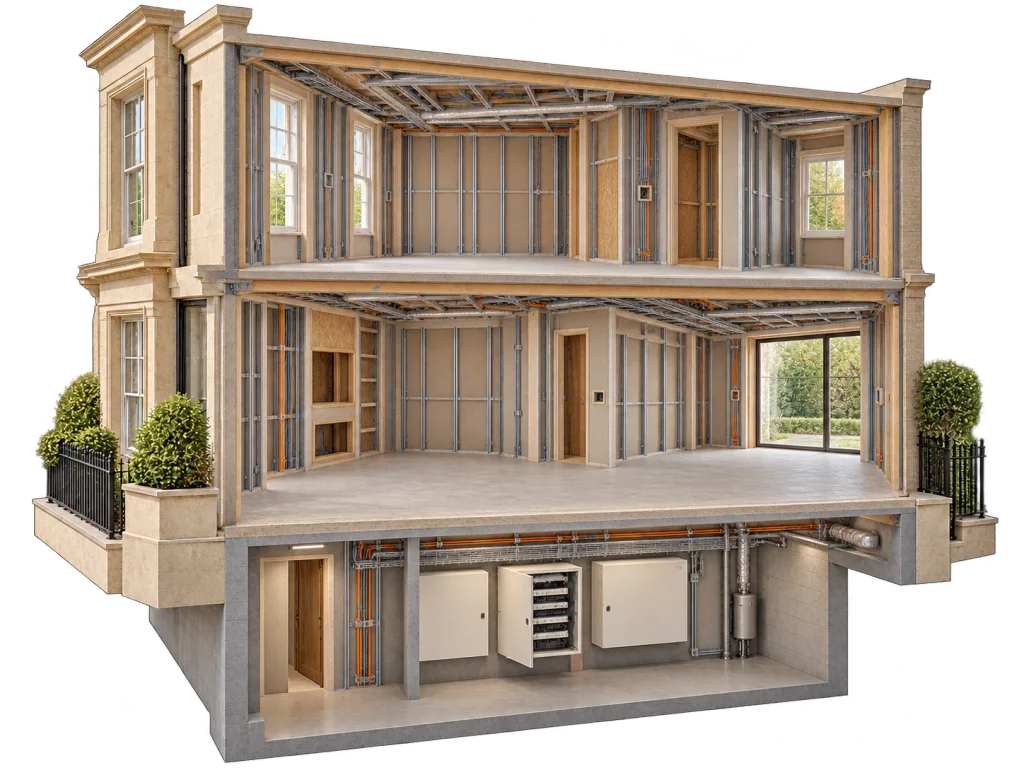
We coordinate the technology with the architecture and interior scheme. Light fittings, keypad positions, blinds, speakers, screens and equipment space are considered together, so each belongs in the room.
The decisions are practical as well as visual. We review lighting circuits and drivers, shade power and control, speaker and screen positions, network connections and the interfaces needed for room comfort. Drawings and schedules give your project team a clear view of the installation.
Stage 3 of 7
Put the provision in place before the finishes conceal it.
First fix puts the foundations in place before the finishes close the walls and ceilings. Cable routes, lighting connections, network points, speaker wiring and provision for shading are installed around the agreed design.
This is where many of the finished home's possibilities take shape. A well-positioned network connection supports the equipment that needs it. Planned shade provision keeps the window detail considered. Labelled cabling makes the installation easier to understand and look after.
For an existing home, we plan the work around the building as it stands. A suitable wireless lighting system can add flexible controls while the powered lighting devices and wider installation receive the attention they need.
Stage 4 of 7
Give the equipment an organised, accessible home.
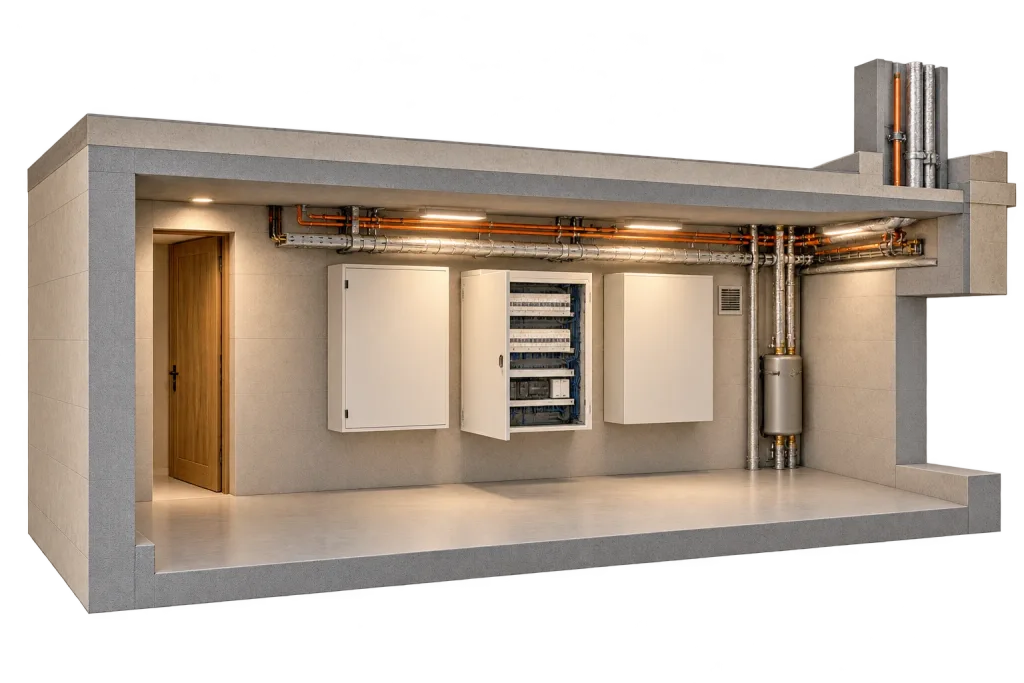
Behind the finished rooms, the equipment needs a carefully planned home of its own. Lighting controls, network switches, audiovisual equipment and supported interfaces each have a defined role.
We organise these elements around access, connections and the way the system will be maintained. The network is designed alongside the connected equipment, with wired links and Wi-Fi serving the places where they are useful.
An Alisse keypad, for example, sends a command to a supported HomeWorks QSX system. The lighting-control equipment then adjusts the relevant circuits. The keypad is the elegant part you touch; the installation behind it does the work.
Stage 5 of 7
Make the visible controls belong to the interior.
Keypads, window treatments, speakers and screens become part of the completed interior. We coordinate the visible details with the design, from a considered keypad finish to the way a blind sits at the window.
The aim is a room that feels complete. Lighting supports the materials and furniture. Music belongs in the space. Entertainment is comfortable to watch and listen to. Controls are positioned where they make sense in daily use.
Stage 6 of 7
Refine the settings and check the agreed functions.
Programming turns the installed equipment into a home shaped around you. We develop lighting scenes, shading positions, entertainment settings and agreed room-control functions, then test how the selected systems respond together.
We refine the details in the finished spaces: the balance of light, the sound in the room, the picture settings and the network coverage where connected devices are used. For heating and cooling integration, we agree the supported controls and test the intended responses with the relevant system.
Stage 7 of 7
Introduce the controls and confirm the handover records.
A personal handover introduces the controls and everyday routines. We show you how the rooms work, explain the useful options and agree how the system will be supported.
Clear records help keep the installation understandable. The handover brings together the relevant equipment information, control guidance, ownership arrangements and care options for your project.
Different jobs. Connected thinking.
A keypad sends a command. Lighting equipment adjusts the circuit. Other selected systems respond through their supported connections. Control, electrical power and the network each have a distinct role.

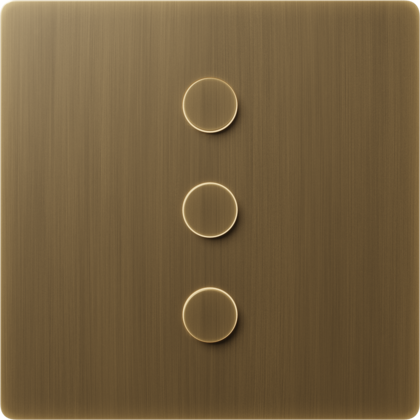

Product images: Lutron. Alisse is a wired QS-link keypad for a supported HomeWorks QSX system; it does not power the lighting circuit.
Conceptual system explanation, not a wiring diagram. Exact links, power provision and interfaces follow the project design.
An upgrade starts with what is already there. We survey the circuits, fittings, controls and network, then choose a practical route around the building. RadioRA 3 can provide suitable wireless lighting control; powered lighting devices still need an appropriate electrical supply.
The proposal sets out the services chosen for your property, their supported connections and each specialist's responsibilities.
Lighting scenes and considered keypad controls, designed around the rooms and routines you enjoy.
Daylight, privacy and window treatments coordinated with the interior and selected control system.
Music, television and room controls planned around the spaces in use, indoors and outside.
Picture, sound, room layout and cinema lighting brought into one considered design.
Wired links and wireless coverage planned alongside the connected devices and their demands.
Supported KNX and building-system interfaces with clear specialist ownership and agreed tests.
Entry communication and access functions chosen for the property and coordinated with the wider installation.
A clear route to advice, adjustments and improvements under the support arrangements agreed for your home.
An example of our working method
A useful function schedule connects what you want to enjoy with what the team designs and verifies. This is a design example, not a completed client commissioning record.
Identify the lighting circuits, privacy-shade positions and selected music action. Record the keypad label and the supported connection between the chosen systems.
Confirm that the agreed button produces the intended lighting and shading setting, and that any selected music action responds through its supported interface.
Schedule the audiovisual input and sound arrangement alongside the cinema-lighting scene and shade position. Identify the owner of each command and the agreed return to normal use.
Demonstrate the agreed picture, sound, lighting and shading sequence, then check the intended exit from the cinema setting.
Identify the rooms and lighting scenes in use, the music zones and the selected source. Keep independent room adjustments clear.
Verify the agreed grouping, sound level and room-lighting behaviour, including the controls that remain available locally.
Record the wired points, equipment connections and wireless coverage areas required by the selected devices. Coordinate access and equipment locations.
Verify the agreed connections and coverage in the relevant rooms, recording the actual test method, results and any actions.
Identify the heating or cooling system owner, supported commands, required feedback and responsibility for configuration.
Jointly verify the agreed command and status response with the relevant specialist. A requested setting is distinct from the time the room takes to reach it.
Agree the receiving devices, call behaviour and specified access functions with the entry-system owner.
Demonstrate the agreed call and access functions on the specified equipment. Include only the supported functions in the acceptance record.
Your project schedule identifies the actual equipment, drawing revisions, interface owners, acceptance results and outstanding actions.
Real homes
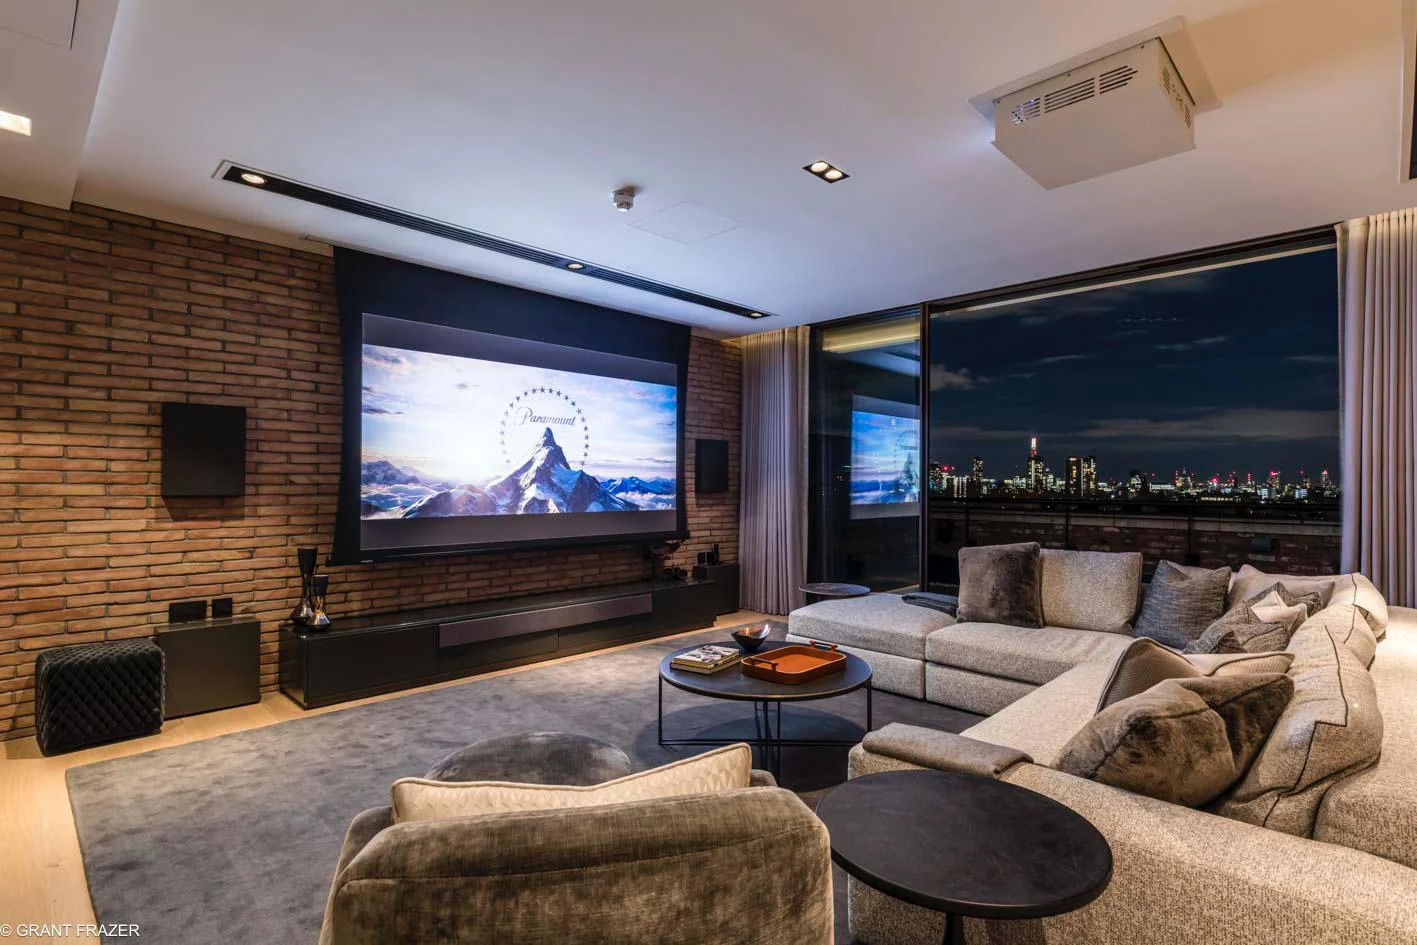
Lighting, shading, home control and entertainment come together in this Angel penthouse. Its HomeWorks QS lighting and Sivoia window treatments sit alongside Savant control, cinema sound and a managed network, with entertainment extending to the rooftop.
Real project photography: London Electricals published Islington case study.
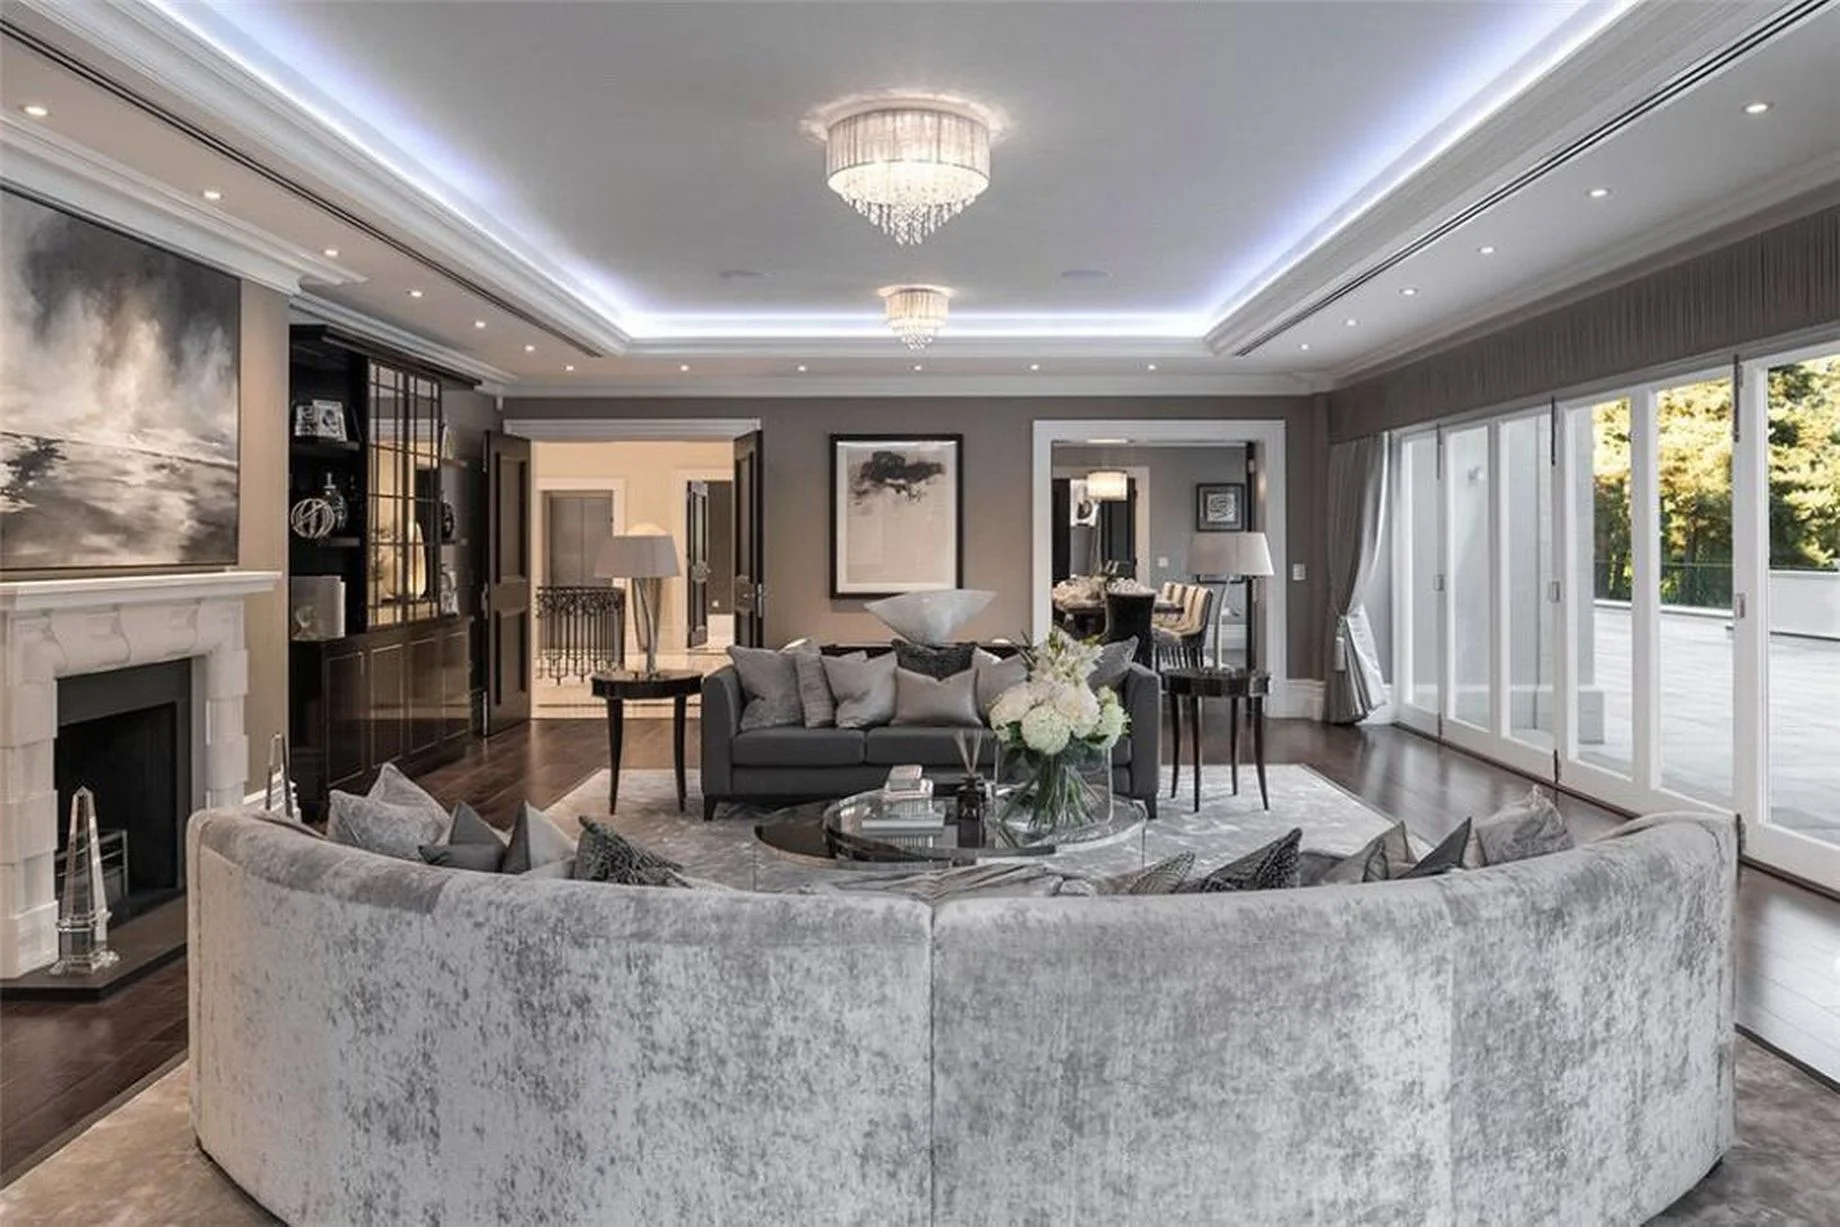
An existing home's systems can form the starting point for a considered improvement. At Woodrow, HomeWorks QS lighting was introduced while KNX continued to serve heating and mechanical systems, with Savant bringing the controls together.
Project delivered by GLO Audio Visual.
Early design conversations give us the opportunity to coordinate the lighting, controls, shading and technology with your architect and interior designer. Before first fix is an excellent time to agree positions, equipment space and cable provision.
Yes. We review the installed systems and the changes you want, then plan an upgrade around the property. That can include improved lighting controls, shading, entertainment, network coverage or a more joined-up control experience.
We select systems for the job they do and design the supported connections between them. Your lighting, entertainment, shading and room controls each have a role, with a clear plan for how they work together.
Many connected devices rely on it for communication, streaming or everyday control. Planning the wired connections and Wi-Fi alongside the equipment gives the whole installation a stronger foundation.
We start with the room and your routines. The button names and actions are then arranged around useful settings, such as cooking, evening or a film, with the details refined during programming and handover.
We introduce the completed system, provide the relevant records and discuss ongoing care. As your home and routines develop, the support plan gives you a clear way to request advice, adjustments and improvements.
Share your plans, your project stage and the rooms that matter most. We will help bring the right services together.
Discuss your homeReview the scope with your project team →Talk to an engineer
Share your ideas for the home. We will help shape the design, installation or ongoing care around you.